
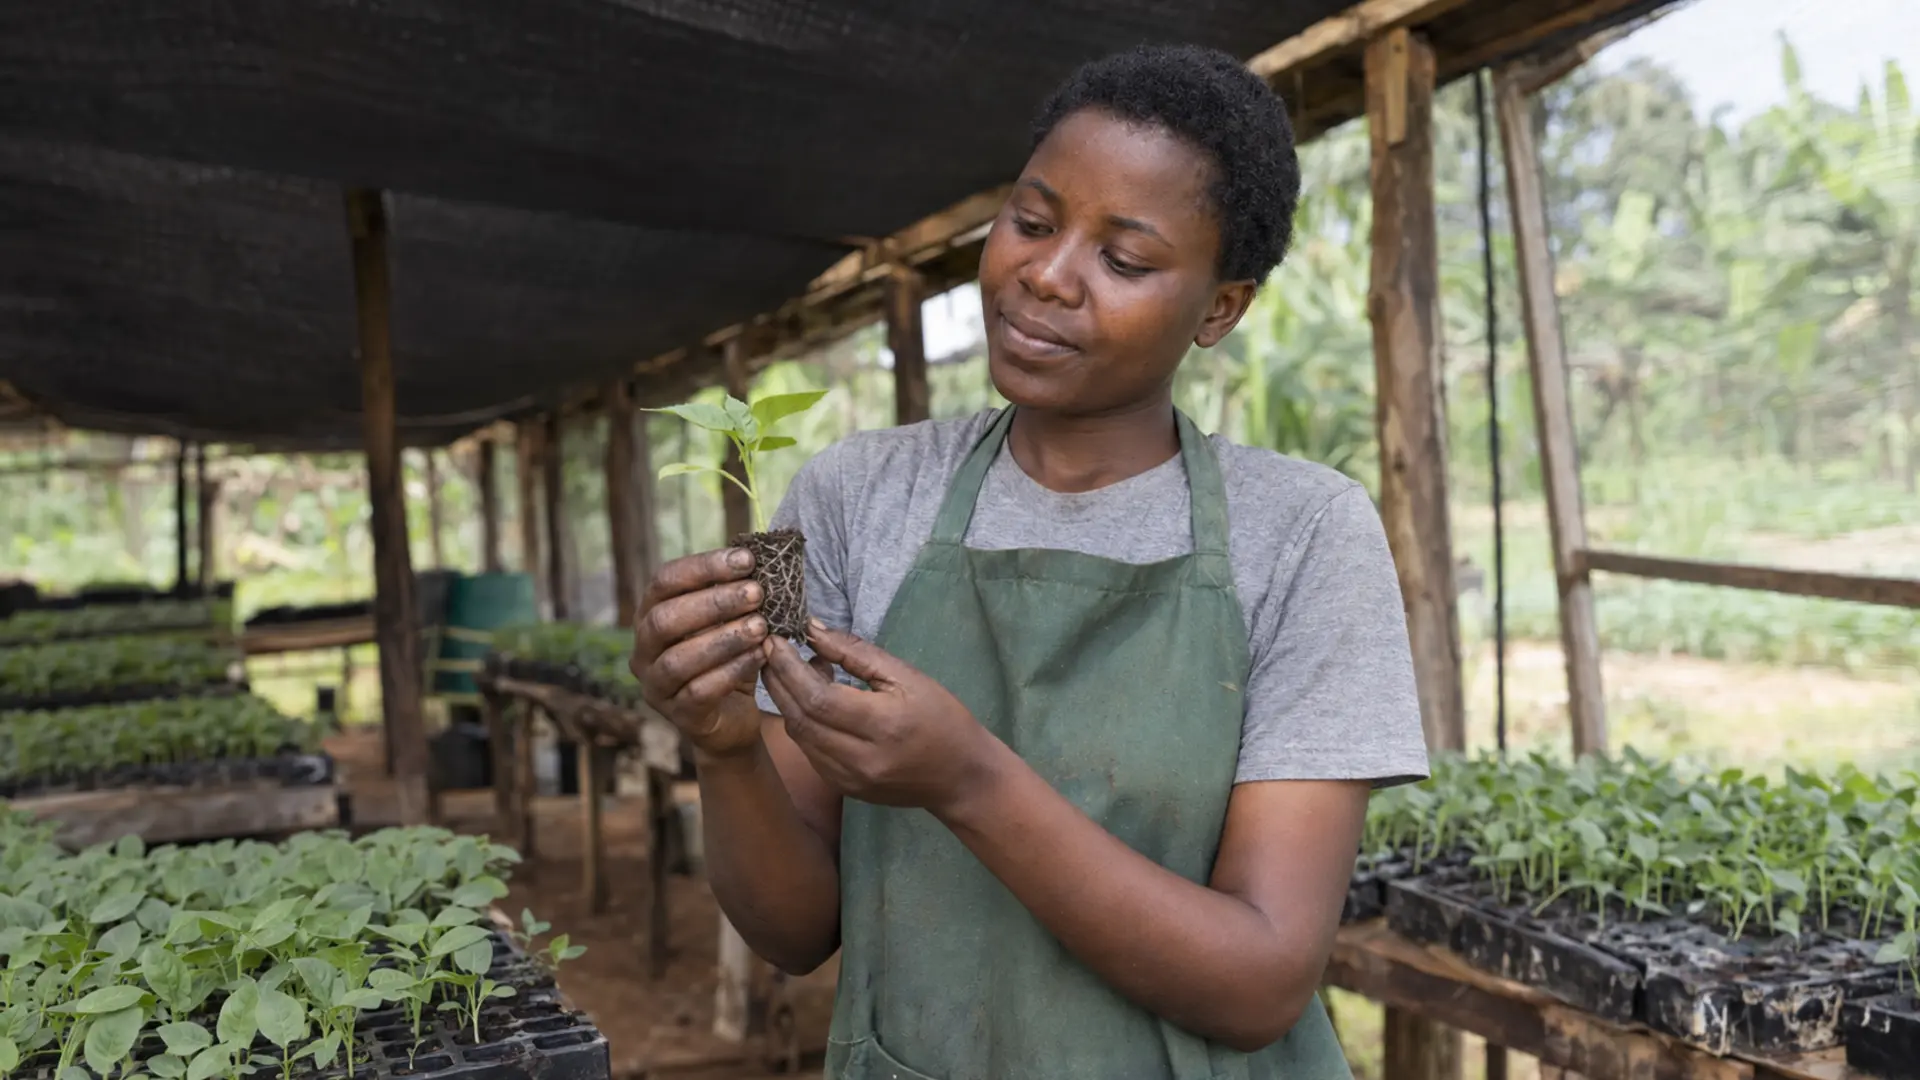
A greenhouse crop is usually lost before it is planted.
By the time a grower is standing in the house looking at uneven plants, patchy vigour and a few stems collapsing at soil level, the decisions that produced that result were taken four to six weeks earlier in a nursery that nobody thought of as a serious production unit. The nursery is treated as a holding area. It is actually the point at which the crop’s uniformity, its root architecture, its early disease exposure and its transplant shock are all fixed.
This guide sets out a nursery routine that can be repeated batch after batch and audited afterwards. It covers what to raise seedlings in, how to treat growing media without chemicals, how to water without guessing, how to keep a nursery clean, how to harden seedlings properly and how to judge transplant readiness on evidence rather than on the calendar.
Why the nursery decides more than the field does
Three things happen in a nursery that cannot be corrected later.
The first is root architecture. A seedling raised in a tray cell develops a root system shaped by that cell. If the cell is too small for the time the seedling spends in it, roots circle the wall, and the plant carries that circling habit into the ground. If the plug falls apart at lifting, the working root tips are torn off and the plant spends its first two weeks in the greenhouse rebuilding what it already had.
The second is soil-borne disease exposure. Damping-off pathogens live in soil, in reused trays and in dirty water. A seedling that meets them at the cotyledon stage usually dies. A seedling that meets the same organisms six weeks later, with a woody stem base, often does not. The nursery is the window in which the plant is least able to defend itself, which is exactly why nursery hygiene matters more than greenhouse hygiene.
The third is uniformity. A greenhouse crop is managed as a single unit: one irrigation schedule, one trellising pass, one harvest interval. That only works if the plants are at the same stage. Uniformity is not created in the greenhouse. It is created by even sowing depth, even media moisture and even temperature across the nursery bench, and it is destroyed by a nursery bench that is half in sun and half in shade.
What this guide helps you decide
It helps you decide what to raise seedlings in, how to prepare and treat the media, what your daily nursery routine looks like, when to start hardening, and whether an individual tray of seedlings should go to the greenhouse, stay another week, or be thrown away.
It does not cover the substrate you grow the production crop in, grafting, tree-crop or coffee nurseries, or how to choose and buy seed. Seed quality is a separate decision covered in verifying seed and planting material quality, and no nursery routine rescues bad seed.
This guide does not name any chemical media sterilant, fungicide or seed treatment, and does not name seed brands.
One thing to say plainly at the outset. We searched for a Ugandan institutional guide to vegetable seedling nursery practice - from the Ministry, from NARO and its institutes, from Makerere and from the national standards body - and did not find one we could open and read. The nearest Ugandan document we could read is a Ministry field factsheet from a project in the Acholi sub-region, which describes damping-off symptoms accurately and recommends protecting the nursery bed with an insect net or boxed frame more than 20 centimetres high, but which is a localised pest and disease sheet rather than a nursery manual. That gap is why most of the technical sources behind this guide are North American or tropical-Asian extension material, and it is why every figure below is reported with the conditions it came from.
The short answer
Use individual cells rather than an open seedbed, because the plug is what protects the root system at transplant. Fill those cells with a media mix that drains freely and holds moisture without staying saturated. Heat-treat the mix if any part of it is field soil or old plant material, using a thermometer pushed into the media rather than judgement of the steam. Let the media cool fully before sowing. Water in a way that wets the whole cell and then allows the surface to dry. Keep trays off the ground. Harden the seedlings over a period of days before transplanting, not on the morning of transplanting. And judge readiness by the root plug and the true-leaf count, not by height.
Raising Your Own Seedlings: Nursery Practice That Decides the Crop Before It Is Planted
A horizontal nursery workflow timeline running from media preparation through sowing, germination, first true leaves, spacing, hardening and transplant, with the key decision at each stage written beneath it.
Choosing the container
There are three realistic options in Uganda and they are not equivalent.
Open seedbed. A flat bed of prepared soil, sown in rows and lifted bare-root. It is cheap and it is what most smallholders use. It is also the option with the highest transplant shock, because lifting tears roots, and the highest disease risk, because the seedling sits in field soil for its whole nursery life. For a greenhouse crop where every plant occupies an expensive position for six months or more, the open seedbed is the wrong economy.
Individual pots, tubes or sleeves. Small polythene sleeves or reused containers filled with prepared media. These give a genuine plug and are workable at small scale. The drawbacks are labour at filling, the volume of media required, and the difficulty of getting even moisture across a group of loose containers that do not sit level.
Seedling trays with individual cells. Rigid or semi-rigid trays divided into cells, filled with a light media mix. This is the standard for protected-cultivation vegetable production. The cells are uniform, the trays sit level, watering is even, and lifting is a matter of pushing the plug out from below rather than pulling the plant out from above.
For a greenhouse crop, use trays. The cell size matters more than the tray brand: a cell that is too small forces you to transplant on the cell’s timetable rather than the crop’s, and a cell that is too large wastes media and bench space and stays wet too long. Match cell volume to the number of weeks the crop will spend in the nursery, and if the transplant is going to be delayed by weather or by a house that is not ready, plan for the larger cell.
Growing media: what the mix has to do
Nursery media has four jobs. It must hold the seed at a stable moisture level, admit air to the roots, hold the plug together when the seedling is lifted, and carry a low and even nutrient supply. It does not need to be rich. A seedling carries its own food reserve through emergence, and over-rich media produces soft growth that collapses at transplant.
The most common failure in Ugandan nurseries is using unamended field soil. Field soil compacts in a cell, seals at the surface after watering, drains poorly, and brings in weed seed, nematodes and damping-off organisms. If field soil is used at all it should be a minority component of a mix, and the mix should be heat-treated.
A workable mix combines a mineral fraction for structure, an organic fraction for moisture holding and a coarse fraction for drainage. Well-finished compost is the usual organic component, and the word finished is doing real work in that sentence: compost that is still decomposing generates heat and immobilises nitrogen in the cell, and both will damage a seedling. The composting process, including how to tell when a heap is actually finished, is covered in the guide on composting and organic matter.
Do not add fresh manure to nursery media. Do not use soil taken from a field that has recently grown a crop in the same family as the one you are about to raise.
Treating the media without chemicals
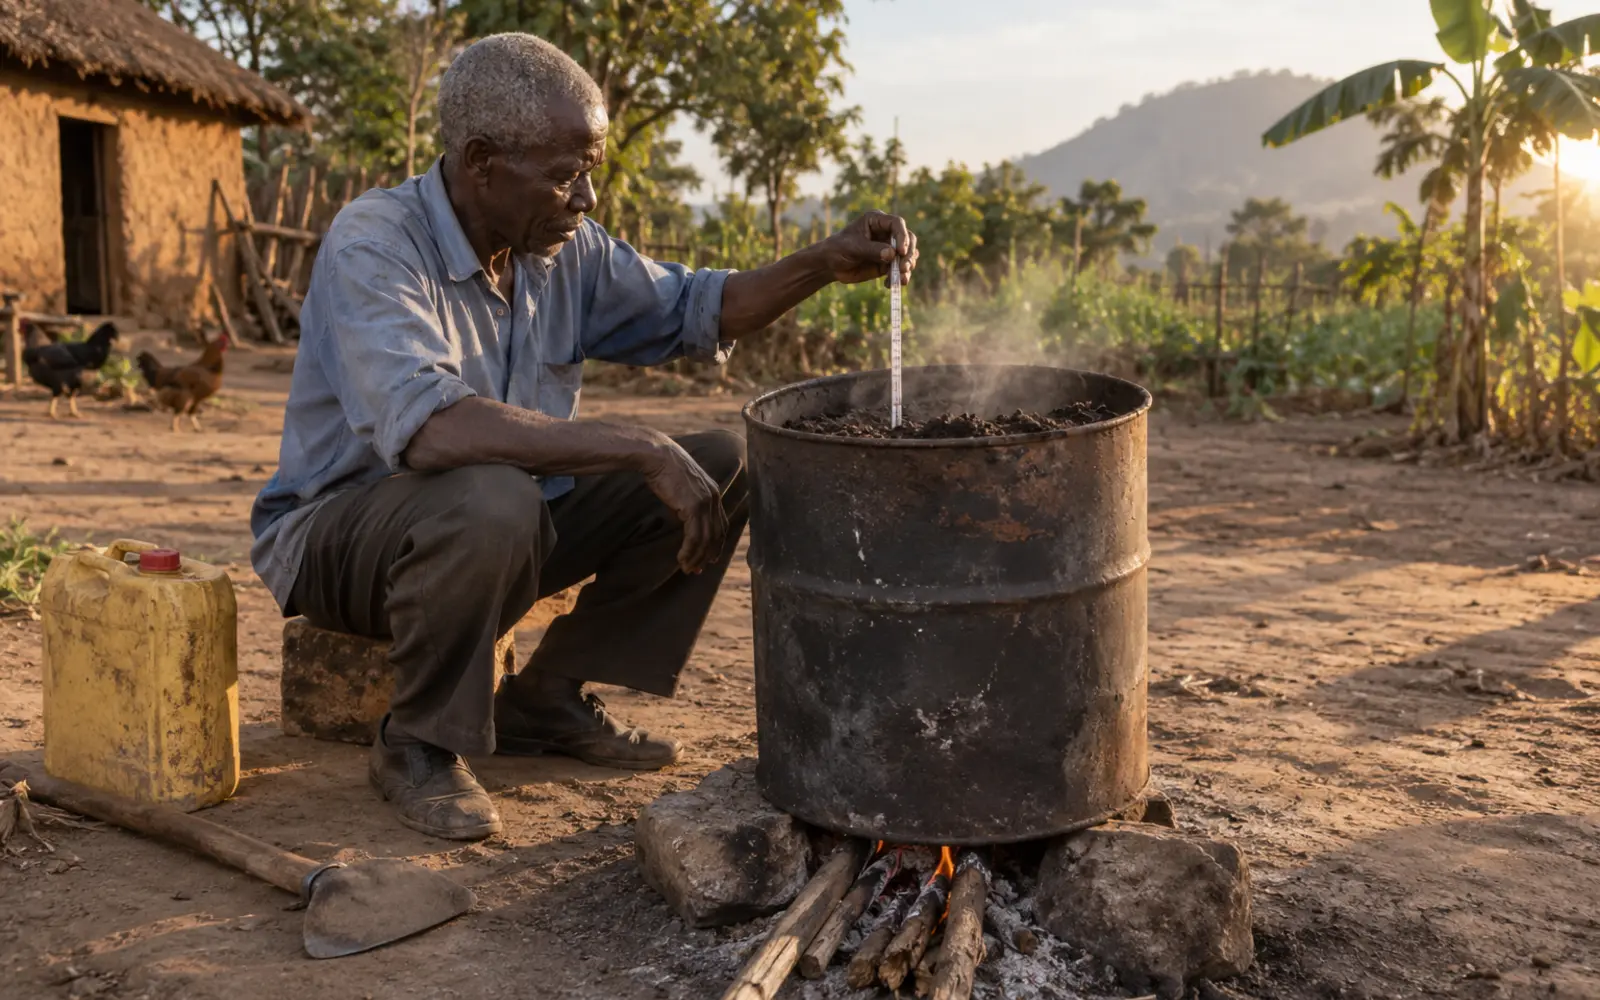
If any part of the mix is field soil, old media or unfinished organic matter, it should be heat-treated before sowing. This is the single highest-return operation in a small nursery, and it requires nothing but a drum, a fire, water and a thermometer.
The principle is that the organisms that kill seedlings are killed by moist heat at temperatures well below those that damage the media itself. The target is a band, not a maximum.
The band that is best supported in the published extension literature is 71 to 82 degrees Celsius, held for 30 minutes. That figure comes from North American greenhouse practice, where it is given as producing good results, and it should be read as a starting point for Ugandan conditions rather than as a validated local standard. We found no Ugandan trial establishing a media treatment temperature, and we are not going to present a temperate figure as though it were one.
Too little heat leaves the pathogens alive. Too much heat is a real and separate problem: the same source describes overheating as producing overkill of the beneficial microflora, an increase in total soluble salts and changes to the soil structure. A medium that has been cooked rather than pasteurised is biologically empty, saltier than it was, and structurally degraded, which in practice makes it easy for a contaminant to recolonise without competition.
The procedure:
- Moisten the media before heating. Moist heat penetrates and kills; dry heat does neither at these temperatures. The media should be damp, not wet.
- Load the drum to a depth you can actually heat through. A shallow layer heats evenly; a deep drum has a hot base and a cold core.
- Push a stem thermometer into the centre of the media mass, not into the air above it and not against the drum wall. The drum wall will read far hotter than the media core.
- Heat until the coldest part of the media reaches the target temperature, then hold it there for 30 minutes. Start timing from when the target is reached, not from when the fire was lit. Reading the drum wall instead of the media core is the commonest way this step goes wrong, because the wall will be far hotter than the media.
- Remove from the heat and cover while it cools.
- Let the media cool completely before sowing. Sowing into warm media kills seed. This step is skipped more often than any other and it is not optional.
Raising Your Own Seedlings: Nursery Practice That Decides the Crop Before It Is Planted
An annotated cross-section of a drum used to heat-treat growing media, showing the fire, the media layer, the thermometer position, the target temperature band and the mandatory cooling period before sowing.
Treated media is vulnerable. It has no competing microbial population, so recontamination from a dirty tray, a dirty scoop or a dirty bench spreads faster than it would in untreated media. Treat the media and then handle it as though it were clean, or do not bother treating it.
A practical note on scale: heat treatment is realistic for the volume one grower needs for a batch of trays. It is not realistic for the volume of substrate a production house needs, which is why this guide is about nursery media only.
Sowing
Sowing depth is the variable that most often destroys uniformity. Small vegetable seed sown too deep either fails to emerge or emerges days late and permanently behind the rest of the tray. Sown too shallow, it dries out and dies at the point of radicle emergence. The general rule is to cover the seed to a depth of roughly two to three times its own diameter, which for most small vegetable seed means a very light covering indeed. A nursery guide written for tropical smallholder conditions puts it slightly tighter, at three times the seed diameter. The two are compatible, and either is far shallower than most growers manage by eye.
Fill cells to the rim and strike them level, then make the sowing depression with a purpose-made dibber or a flat-ended stick so that every hole is the same depth. Do not press the media down hard after filling; a compacted cell drains badly and roots poorly.
Place one seed per cell where seed is reliable and the germination percentage is known to be high. Place two where germination is uncertain, and thin to the stronger seedling as soon as the choice is obvious. Thin by cutting at media level rather than pulling, so the remaining seedling’s roots are not disturbed.
Label every tray at sowing with the variety and the sowing date. A nursery without labels produces a greenhouse without records, and the gross-margin analysis at the end of the season then has nothing to work with. Record keeping is covered in farm record keeping and gross margin analysis.
Water: the daily decision
More nursery seedlings are killed by watering than by any pathogen, and the pathogen is usually just the mechanism.
The rule is to wet the entire cell and then allow the surface to dry between waterings. A cell that is wetted only at the top develops a shallow root system sitting in the wettest, least aerated zone of the plug. A cell that is never allowed to dry at the surface holds a permanently damp collar around the seedling stem, which is precisely the condition damping-off organisms require.
Water with a fine rose or a mist. A coarse stream displaces media, buries seed at random depths and washes seedlings flat. Water in the morning rather than late in the day, so the foliage and the media surface are dry before nightfall.
Check moisture by weight, not by appearance. Lift a tray. A fully watered tray is noticeably heavy; a tray approaching dryness is noticeably light. After a few days of doing this you will know both weights, and you will stop guessing from the colour of the surface, which is misleading because the surface is supposed to dry.
Water quality matters. Water drawn from an open pond or a channel carries soil-borne pathogens directly onto the seedlings that are least able to resist them. Nursery water should come from the cleanest source on the farm. Water source selection is discussed in the guide on on-farm water sources.
Nursery hygiene
Hygiene in a nursery is a set of physical habits, not a product.
Keep trays off the ground. A tray sitting on soil is wicking pathogens upward and is being splashed from below every time it rains or is watered. Benches, raised timber, blocks, anything that creates a gap.
Wash and dry trays between batches. Old media in a cell corner carries last batch’s problems into this one. Physical removal of debris, then washing, then full drying in sunlight.
Keep one scoop for treated media and never let it touch untreated soil. Keep the media store covered and off the ground.
Do not walk from the production house into the nursery. The nursery should be the first place you go in the morning and the last place you enter after handling a diseased crop, or better, not at all after handling a diseased crop. Whole-farm movement control is covered in whole-farm biosecurity.
Remove dead and collapsed seedlings from trays immediately and take them off the nursery site. A collapsed seedling is a sporulating body sitting among healthy plants.
Keep weeds out of and around the nursery. They host both pathogens and the insects that vector them.
Screen the nursery against insects if you can. A nursery is a small area, so screening it is cheap in a way that screening a production house is not, and seedlings that arrive in the greenhouse already carrying an infestation start the crop’s pest management in deficit. The scouting logic that follows is set out in integrated pest management scouting and thresholds.
Light, heat and the leggy seedling
A leggy seedling is a seedling that has been told, by its environment, that it is losing a competition for light. The stem elongates, the internodes stretch, the stem thins and the plant becomes structurally weak. Legginess is not reversible. A stretched seedling can be planted deeper in some crops, but it never becomes a compact seedling again.
The causes, in order of frequency in Ugandan nurseries: too much shade over the nursery, seedlings left too long at close spacing so they shade each other, and excessive nitrogen in the media.
Shade netting over a nursery is often installed for heat management and then never adjusted. A nursery under heavy shade in a cool highland district in a cloudy month is a nursery producing weak plants. Shade should be matched to the light conditions of the moment, and the decision about how much shade a structure needs at all is dealt with in the companion guide on choosing between a shade net house and a full greenhouse.
Spacing is the correction that costs nothing. As soon as adjacent seedlings’ leaves begin to overlap, they are competing. Move trays apart, or move seedlings into wider spacing, before the overlap becomes shading.
Heat management in the nursery matters for the opposite reason. A closed nursery structure in a hot low-altitude district can reach temperatures that stall germination and scorch cotyledons. The general principles for managing heat and humidity under cover are set out in the guide on greenhouse heat and humidity.
Hardening
Hardening is the process of gradually exposing a nursery-raised seedling to the conditions it will meet after transplanting, so that the change is a transition rather than a shock.
A seedling raised under shade, watered daily and sheltered from wind has thin cuticles, soft tissue and stomata that do not close quickly. Moved directly into full field or greenhouse conditions, it wilts, scorches and stalls. Hardening thickens the cuticle, toughens the tissue and produces a plant that keeps growing through the transplant rather than pausing for a week.
Hardening is done by progressively reducing shade and progressively reducing water over a period of days before transplanting. Reducing water means lengthening the interval between waterings so the plant experiences mild moisture stress; it does not mean withholding water until the plant wilts hard. A seedling that has been wilted to the point of leaf damage has not been hardened, it has been injured.
Hardening on the morning of transplanting is not hardening. If the transplant date moves, the hardening schedule moves with it.
Do not over-harden. The documented consequences of pushing hardening too far are not trivial: excessive hardening exhausts the plant’s energy reserves, and in cool-season crops the published warning is that exposure to very low temperatures during hardening can cause bolting or buttoning later. The published hardening periods are short - three to six days is described as adequate - which is worth knowing, because a grower who believes longer is safer is working against the evidence.
We looked specifically for a source stating that a hardened seedling held too long becomes permanently stunted. We did not find one. The documented outcomes are exhausted reserves, bolting, buttoning and reduced yield potential, and those are what this guide claims.
Judging transplant readiness
Age is the worst readiness indicator in use. Two trays sown on the same day under different shade, different water and different media will be at different stages, and the calendar does not know that.
Judge on three things.
The true-leaf count. This is the criterion with the clearest published support. A tropical nursery guide for tomato gives seedlings as ready at 25 to 26 days old with four to five true leaves. Count true leaves, not cotyledons. The number is crop-specific, so establish it for the crop you are raising rather than carrying tomato’s figure across.
The root plug. Push a plug out from below. A ready plug holds its shape when handled, held together by white working roots visible at the surface of the plug but not yet circling the cell wall. A plug that crumbles is not ready. A plug that is a solid mat of coiled roots is past ready, and the plant is already stressed.
A note on the evidence here, because it matters. The root-bound end of that description is well documented: the published work is clear that transplants in small cells become root-bound, that root-bound transplants re-establish more slowly, and that a plant must have enough time in the cell to develop roots without becoming root-bound. What we could not find in any source we could open was a published statement of plug integrity - the plug holding together as a unit - as a formal readiness test. It is standard practice among growers and it is a sound physical check, but we are presenting it as practitioner judgement rather than as a sourced criterion, because that is what it is.
The stem. A ready stem is short, thick relative to its length, and firm. Run a finger along it. A stem that bends limply, or that is pinched or darkened at media level, disqualifies the seedling regardless of what the leaves look like.
Raising Your Own Seedlings: Nursery Practice That Decides the Crop Before It Is Planted
A two-column identification card contrasting a seedling that is ready to transplant with five reject conditions, each shown as a simple line drawing with the fault named beneath it.
Reject rather than plant a marginal seedling. A weak seedling planted into a greenhouse position occupies that position, and its irrigation and labour share, for the entire crop cycle, and returns less than nothing. The cost of an empty cell in a tray is the cost of one seed. The cost of a failing plant in a production house is a season’s share of every input that house consumes.
The mistakes that recur
Sowing into warm media after heat treatment. Kills the seed outright. The grower concludes the seed was bad.
Treating the media and then using dirty trays. Undoes the treatment completely, and in freshly treated media a contaminant meets no competition.
Watering in the evening. Leaves the media surface and the seedling collar wet through the night, which is the condition damping-off requires.
Heavy shade left on through cloudy weeks. Produces legginess that is blamed on the variety.
Leaving seedlings at sowing spacing until transplant. Guarantees mutual shading in the second half of the nursery period.
Lifting bare-root from a seedbed and calling the result a transplant. The plant spends its establishment period regrowing torn roots.
Transplanting on a fixed date regardless of the trays. Produces a greenhouse with three different crop stages in it and no possible single management schedule.
Reusing media from a failed batch. Whatever killed the first batch is still in it.
Fertilising the nursery to push growth. Produces soft, leggy plants that transplant badly.
No labels. Removes any possibility of learning from the batch.
When to call for help
Call an extension officer, a plant health inspector or a diagnostic laboratory rather than treating, when:
- Seedlings collapse at the media line across a tray or several trays within a day or two. Rapid collapse across a batch is a soil-borne problem, and identifying it matters more than reacting to it.
- Seedlings show mottling, distortion or marked stunting that does not match a watering or nutrition explanation. Virus symptoms need identification, not treatment, and the affected material should not be planted.
- A pest appears in a nursery that has not been seen on the farm before.
- Damage recurs in successive batches despite corrected media, clean trays and corrected watering.
This guide does not recommend any fungicide, seed treatment or chemical media sterilant, and a grower who is offered one should ask what the product is registered for, who registered it and what the pre-harvest interval is before accepting it. The framework for that conversation is in safe pesticide use, selection, mixing and application, and the wider question of what biological products can and cannot do is covered in biological control and biopesticides.
A practical action plan
Before the batch. Decide the transplant date and count backwards to the sowing date. Confirm the greenhouse will actually be empty and prepared on that date. Prepare and heat-treat media at least a day ahead so it has time to cool. Wash, dry and count trays.
Sowing day. Fill and strike cells level. Dib to a uniform depth. Place the seed. Cover lightly. Label every tray with variety and date. Water in gently with a fine rose. Place trays on benches, not on the ground, in even light.
Days one to emergence. Check moisture twice daily by tray weight. Keep the surface from drying out completely before emergence. Record the date of first emergence and the date of even emergence; the gap between them is your uniformity score for the batch.
Emergence to first true leaves. Shift to a wet-then-dry watering rhythm. Remove collapsed seedlings daily and take them off site. Thin doubles.
First true leaves to spacing. Watch for leaf overlap between neighbouring seedlings and space the trays out before it becomes shading. Reduce shade if stems are elongating.
The hardening period. Reduce shade progressively. Lengthen the interval between waterings progressively. Do not allow hard wilting. Keep the schedule tied to the transplant date.
Transplant day. Assess every tray against the root plug, true-leaf count and stem test. Reject the marginal seedlings. Water the trays thoroughly a few hours before lifting so the plugs come out intact and the seedlings are not moved in a moisture deficit. Move trays to the house in shade, not across a yard in midday sun.
After the batch. Empty, wash and dry the trays immediately rather than stacking them dirty. Write down what the batch did: dates, emergence gap, rejects, and any problem that appeared. That record is what makes the next batch better.
Conclusion
A nursery is not a waiting room. It is the production stage at which the crop’s root system, its uniformity and its early disease exposure are determined, and none of those three can be fixed afterwards.
The routine that produces good seedlings is not complicated and it is not expensive. Clean media, treated if it contains soil and cooled before use. Individual cells rather than an open bed. Even sowing depth. A watering rhythm that wets the whole cell and lets the surface dry. Trays off the ground. Spacing before shading. Hardening on a schedule rather than on the morning. And a transplant decision made on the root plug rather than on the calendar.
A grower who runs that routine and writes down what happened will, within three or four batches, know more about their own nursery than any general guide can tell them. That is the point. The batch record is the part of this that compounds.
Author: Falcon Foundation Ltd Editorial Team
The Falcon Foundation Ltd Editorial Team produces evidence-based agricultural guidance for Ugandan farmers, drawing on published research and institutional sources and translating them into practical decision support. Where evidence is unavailable or contested, we say so rather than filling the gap.